Flashing Gosund EP2 smart plug with Tasmota
Preface
In times of rising energy costs, it can make sense to keep an eye on the energy consumption of individual devices and to implement automatisms that help you save electricity.
If you have the requirement that the data collected is only processed locally, you will not be able to avoid an alternative firmware such as Tasmota.
Tasmota is an open source firmware alternative for devices based on an ESP8266 chip. The firmware pursues the goal of making the devices usable independently of the cloud and preventing vulnerable contacts to the outside.
In this article I will explain how to flash Tasmota to Gosund EP2 Smart Plugs.
What you will need
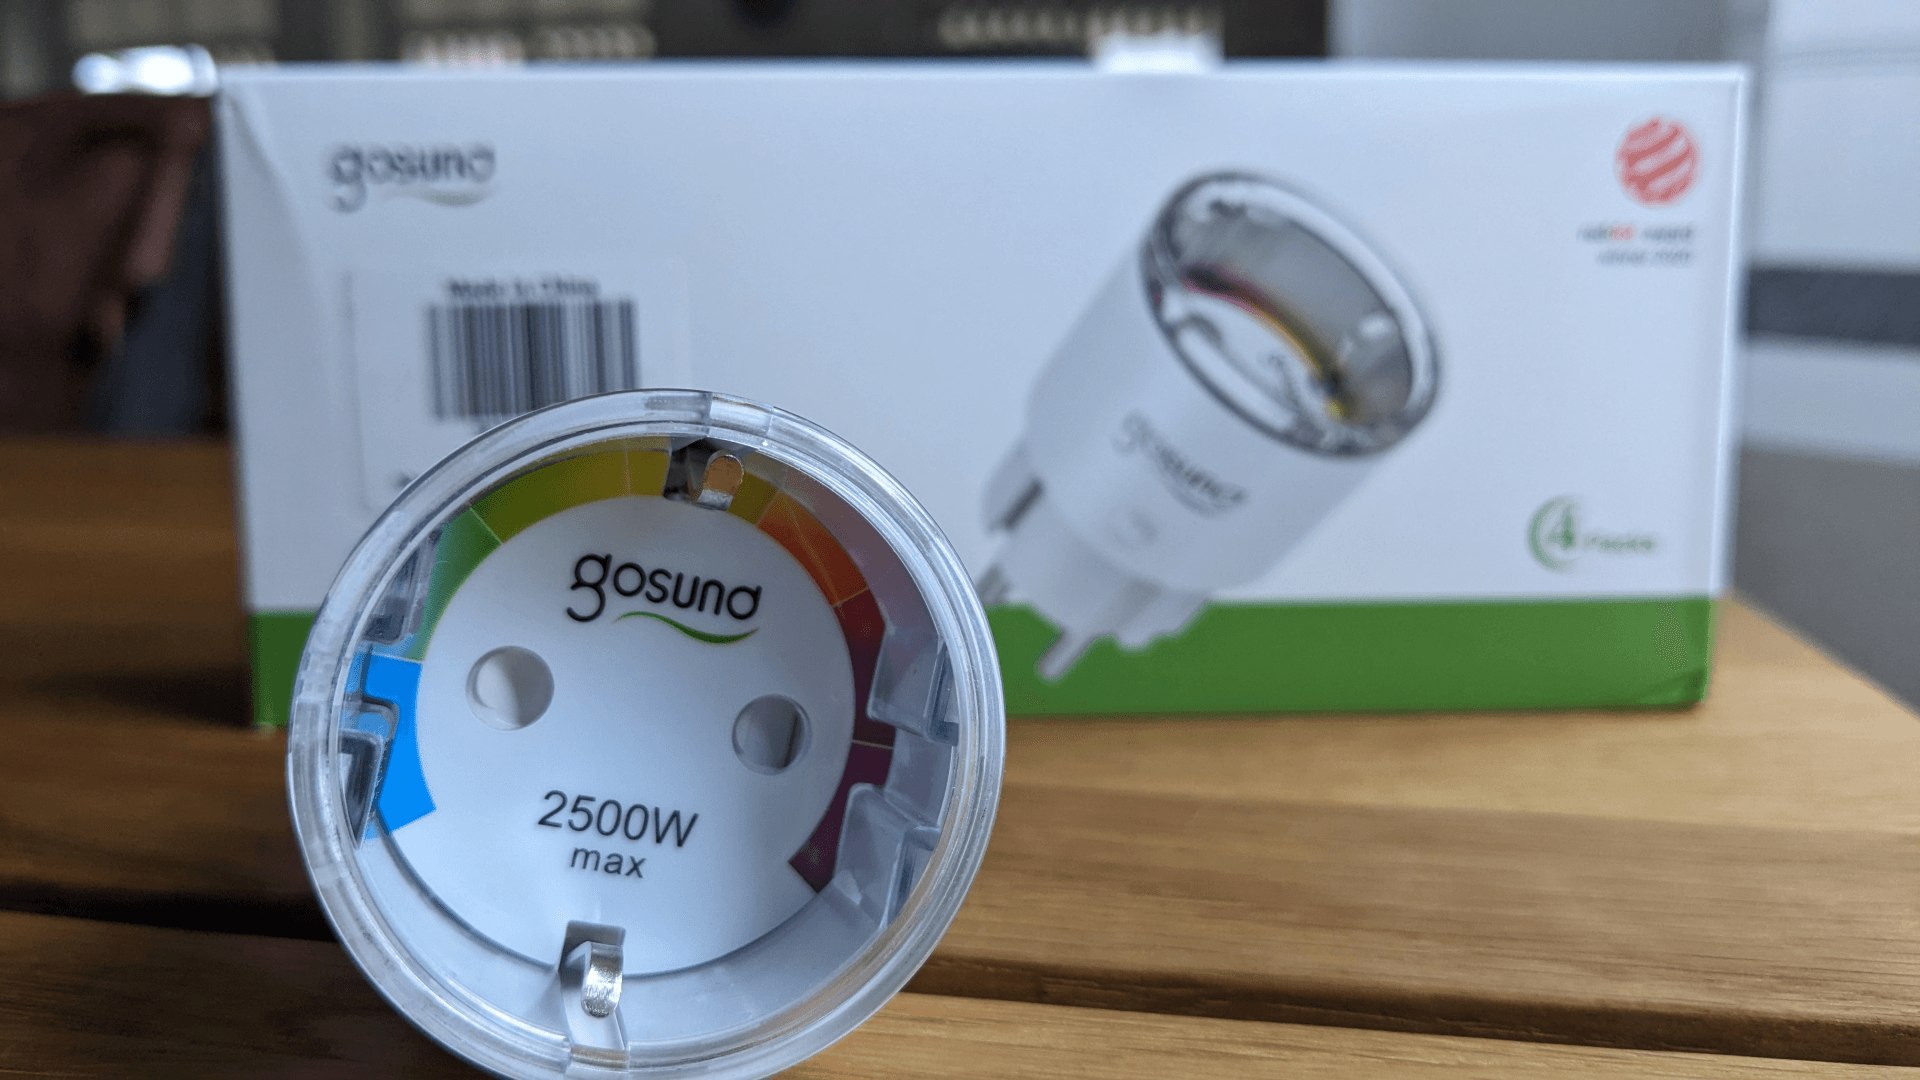
- Gosund EP2 Smart Plug with v1.0.6 (see below)
- Raspberry Pi 3/4 with wifi and network access + power supply
- Empty SD card
- Fresh Pi OS installation
- Smartphone or tablet to act as wifi bridge
- Power measurement device to calibrate the sockets
- Power consumer (e.g. like a light bulb)
Updating firmware to v1.0.6
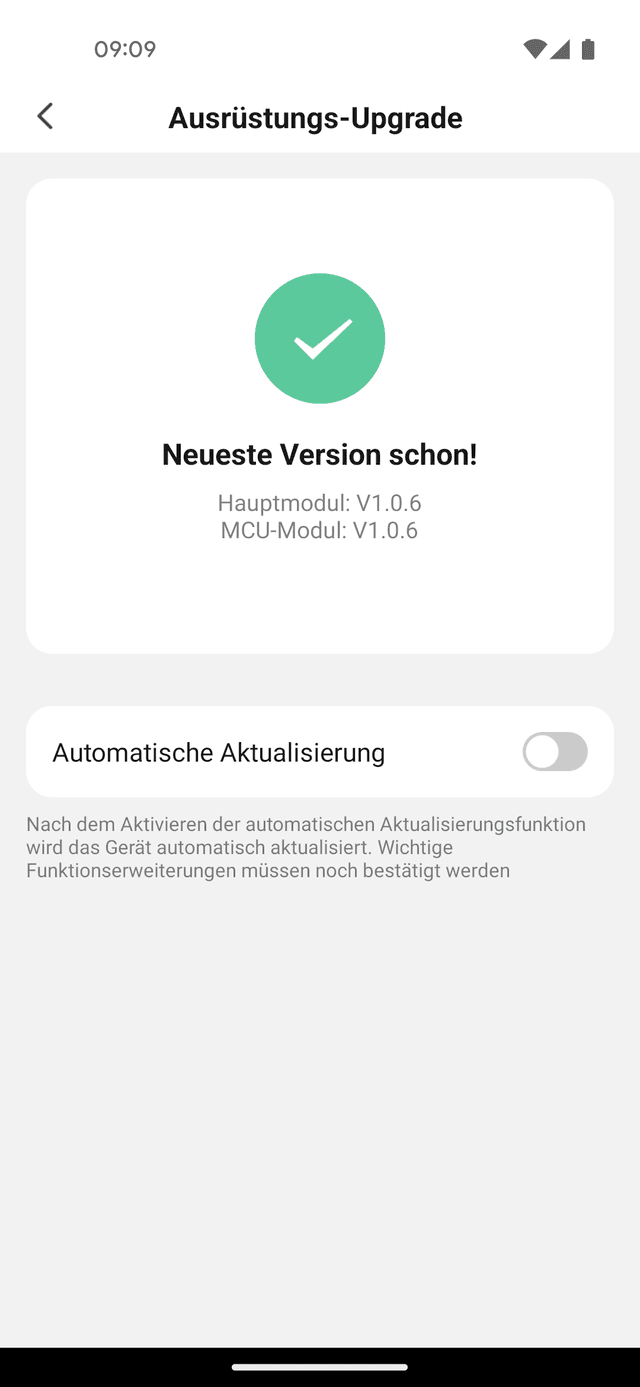
By default, the sockets are delivered with firmware v1.0.4 which is not flashable over the air (OTA). You cannot simply update the sockets yourself to the required version v1.0.6, which is why you have to contact Gosund support for this.
First you have to download and install the "Gosund" App from App Store or Play Store, login and pair your devices with the app and your account.
Inside of the app switch to "Information of the device" and note the virtual ID of it. You have to provide this ID to the Gosund support. Furthermore make sure the MAC of the device starts with 45:55:19:XX:XX:XX to ensure your have WLAN chip from Espressif which is necessary for this project.
Write an email to "globalservice[at]gosund.com" with the template from https://www.tasmota.info/. You may be asked to confirm the information again and to agree that flashing will void the device warranty, but after a short time Gosund support should unlock firmware v1.0.6 for your sockets and the app should report that a firmware update present. In my case it took less than 48 hours to receive the v1.0.6 firmware.
German readers may notice the great translation of the app, another reason to avoid it. 😅
Preparing the Raspberry Pi
I would recommend to download Raspberry Pi Imager to create a fresh Pi OS installation.
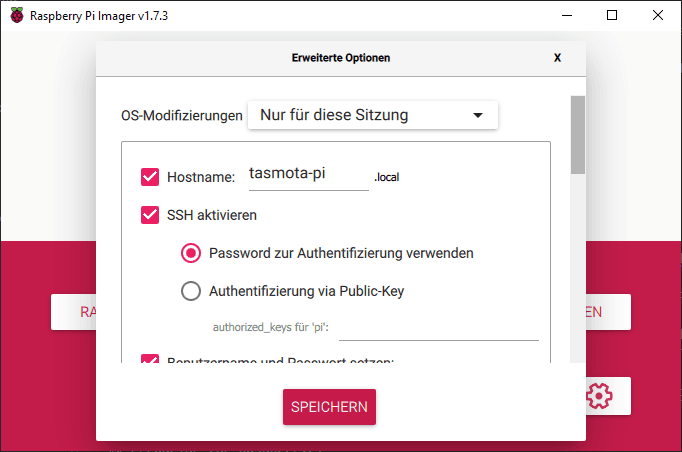
Choose "Raspberry OS Lite (32-bit)" and in advanced settings make sure to:
- Set a hostname you can remember like
tasmota-pi - Enable SSH via password
- Set username and password
- Dot not configure wifi as we need the wifi connection for flashing the sockets
When the SD card has been flashed, insert it into your Raspberry Pi connect your PI to your network via cable and connect your power supply to boot it.
After the Pi has booted, establish a connection via SSH ssh <username>@<host-name or ip-adress> (e.g. ssh pi@tasmota-pi) and enter the password you have configured before.
Update your Pi via sudo apt update && sudo apt upgrade -y and install git afterwards sudo apt install git -y. Clone the tuya-convert repository via git clone https://github.com/ct-Open-Source/tuya-convert and move into the cloned folder cd tuya-convert to install additional dependencies sudo ./install_prereq.sh.
Your Raspberry Pi should now be prepared for flashing the devices with Tasmota.
Flashing Tasmota
The first step is to bring your socket into pairing mode. This can be done either by removing the device from the Gosund app (my preferred option) or by pressing the little button on the plug for at least five seconds. Your plug should now be in paring mode which is indicated by a blue fast flashing of the socket.
Now execute the command sudo ./start_flash.sh on your Pi to start tuya-convert. Read the hint carefully and enter yes. Tuya convert will check for processes occupying ports which are needed for flashing and will ask if the processes should be terminated. Confirm all terminations with y.
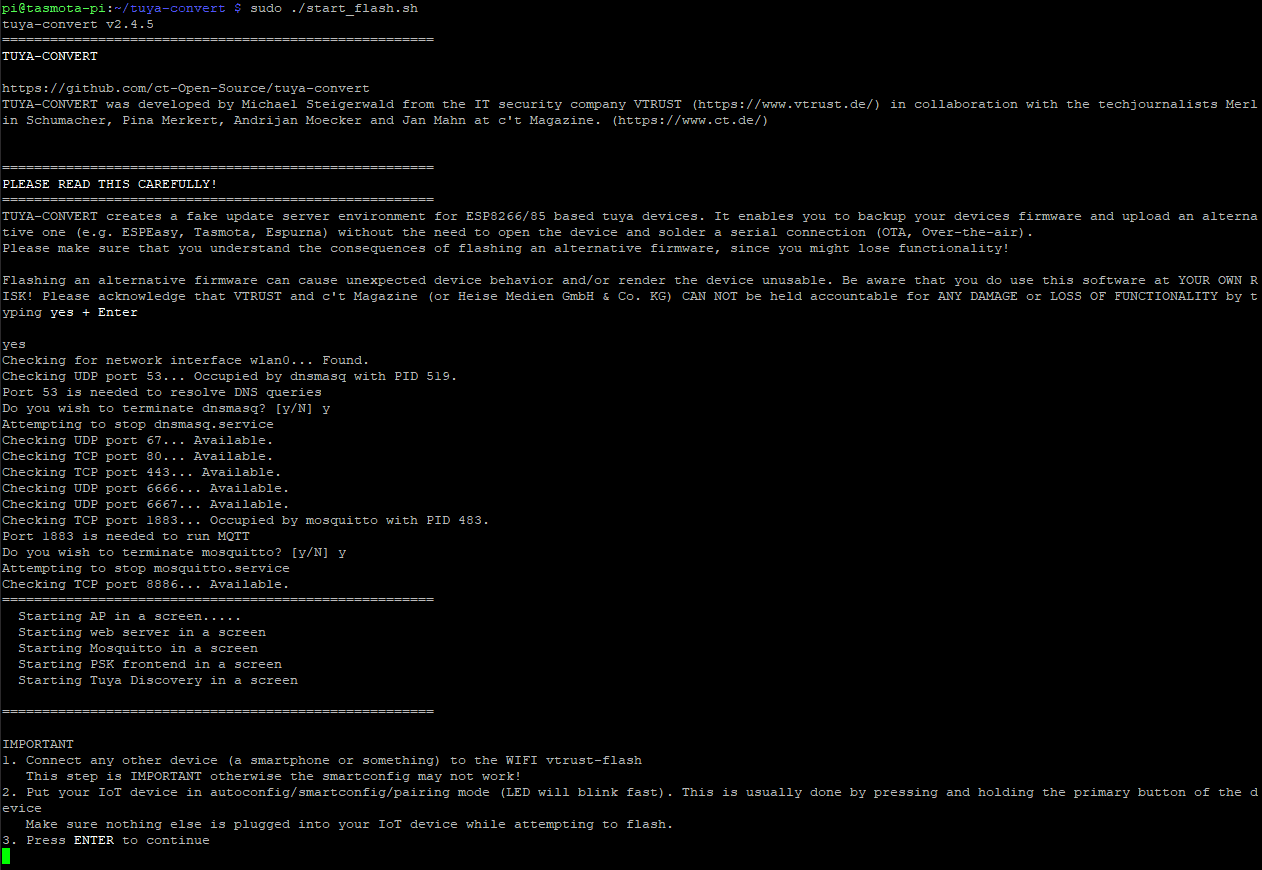
If you reach this screen grab a smartphone and connect to the vtrust-flash network. Make sure you are connected to vtrust-flash with your smartphone and the socket is blinking blue indicating pairing mode.
Now hit "enter" on your Pi and start flashing the device. Don't be hasty, after a while you should be ask which firmware should be flashed on the device. Choose option 2) flash tasmota.bin and confirm with y.
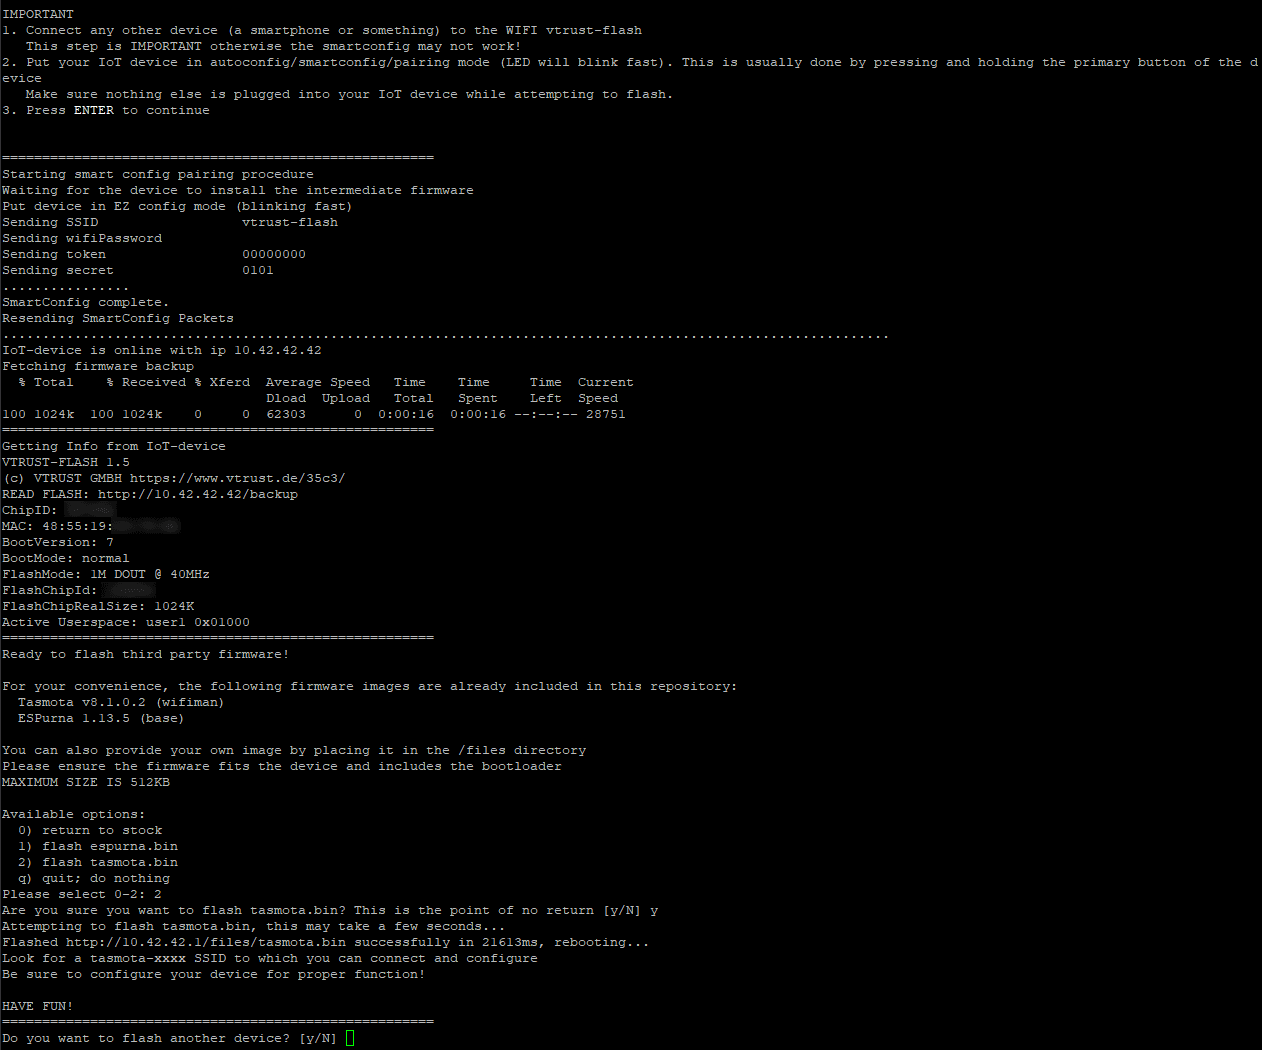
The process ends with the question if more devices should be flashed. Press "enter" to leave the process.
Connecting Tasmota device to your network
After the device has been flashed use your smartphone to connect to a wifi emitted by the socket. It has a name like tasmota_<ChipID>-xxx.
A configuration page should appear where wifi settings can be entered.
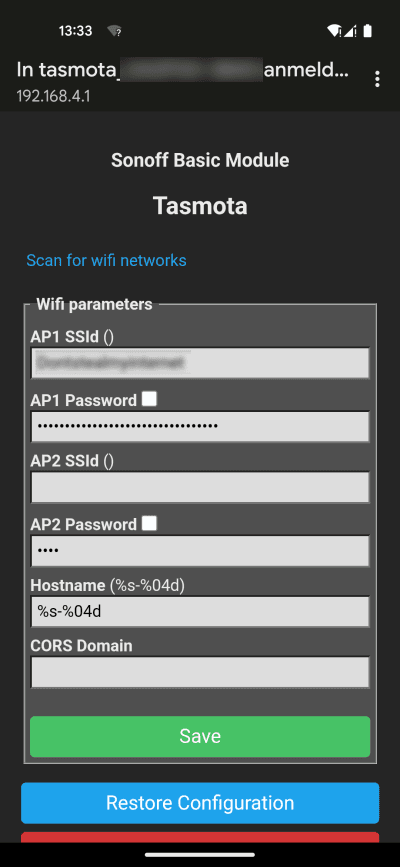
Make sure there are no trailing whitespace and you enter correct data, as you won't be able to connect to the sockets anymore otherwise.
Press "Save" and the device will reboot. It will hopefully appear in your router afterwards and should be accessible via network.
Configuring & Calibrating Tasmota
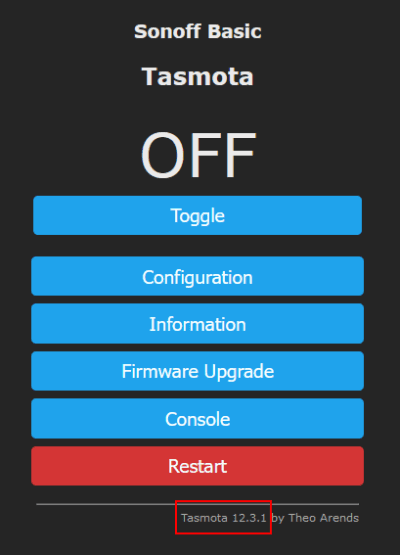
To configure the socket obtain its IP address from your router and enter the Tasmota UI by pasting the IP in your preferred browser. First you should execute a firmware upgrade (OTA) to obtain the latest firmware. It may take a few minutes and afterwards the socket will reboot and display the new version (it was 9.2.0 before).
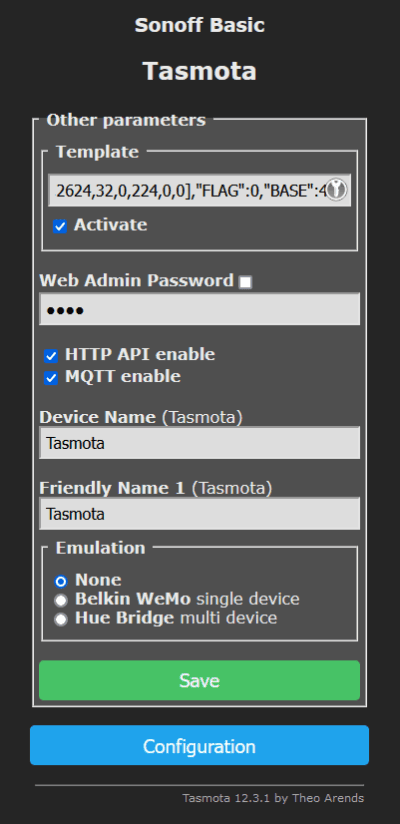
Go to "Configuration → Configure Other" and paste the template into the textfield and check "Activate". Click on "Save" an the device will be rebooted.
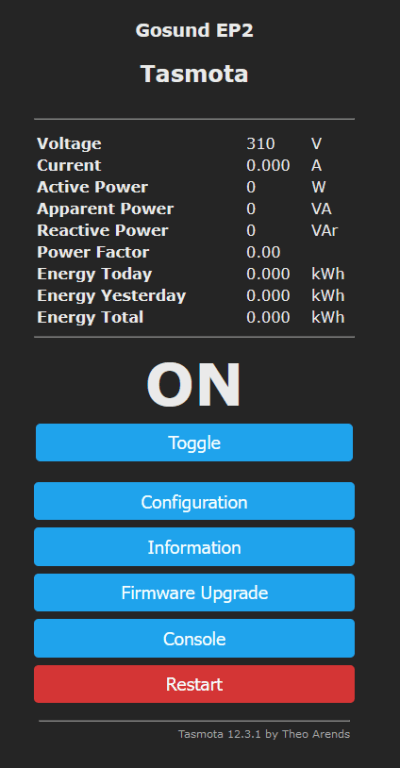
Now, that the GPIO pins are mapped, the UI should show you information about the power consumption. When you hit the "Toggle"-Button you should be able to turn the socket on or off.
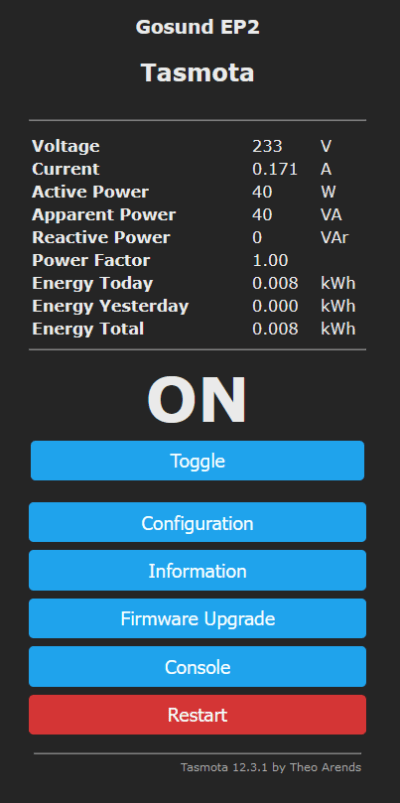
To calibrate the socket you need a consumer with a constant power consumption like an old light bulb and a device to measure its consumption like revolt digital energy cost meter. Plugin the consumer into the measurement device and the measurement device into your Tasmota socket.
Switch the consumer on an go into "Console" on the Tasmota UI. You now have to read voltage and wattage from the measurement device and use VoltageSet <value> (e.g. VoltageSet 232.6) and PowerSet <value> (e.g. PowerSet 39.9) to set these values in Tasmota.
If your measurement isn't capable of measuring the current you have to calculate the value by Amps = Watts / Volts in my case 0.171539 = 39.9 / 232.6. The power level has to be entered in milliamps so the value has to be multiplied by 1000 and the resulting command is CurrentSet 171.539.
When you hit back to the main menu the measurement values should show the correct values.
Congratulations you now have a calibrated Tasmota socket to measure power consumption and to play with.
Epilogue
It takes a little effort to flash and calibrate the Gosund sockets, unfortunately this is not always successful. I was able to successfully flash three of my four sockets, but regrettably something went wrong with one in the meantime, so that it is currently no longer accessible and cannot be put into pairing mode.
Repairing this socket or integrating the working ones into HomeAssistant could be the next posts. 😉